Life
Into the World of Split Keyboards
A journey to escape forward head posture. But it was deeper, darker, and more endless than I thought.

What is good posture?
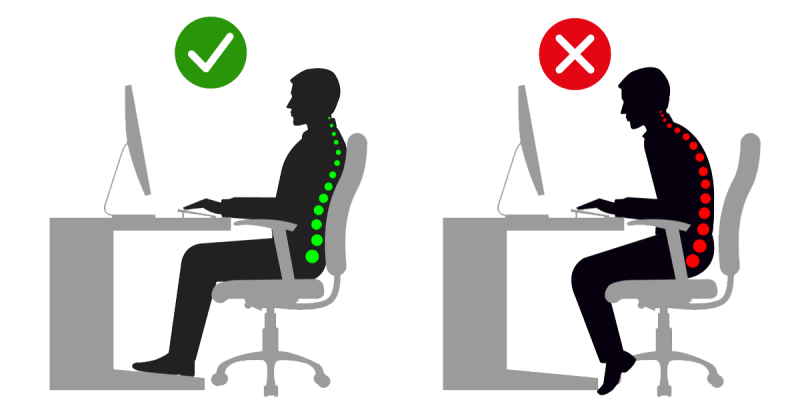
Source: https://corporateenvironments.com/blog/four-benefit-of-ergonomic-chairs
Anyone who spends a lot of time in front of a computer has similar concerns.
How can I maintain good posture?
To be honest, I was far from such worries. That’s not to say my posture was good. It just means I’d never had wrist or neck pain before.
But at some point, I started getting frequent headaches for no reason.
My posture would improve a little if I corrected it, but it would quickly return to the way it was. The headaches were controlled with painkillers or stretching, but they would return if I didn’t maintain good posture.
It was a classic tension headache.
I tried neck stretches whenever it happened.
But the bad habit of us “turtle necks” is to believe that a few minutes of stretching will fix years of bad habits.
It’s the same principle as not being able to lose belly fat accumulated over several years with a few minutes of exercise.
Of course, there was only temporary improvement. As a result, I started looking for ways to achieve better posture.
Ergonomics!
In search of a more ergonomic environment, I changed my monitor and started using a standing desk.
Then, by chance, I came across a split keyboard through an internet post.
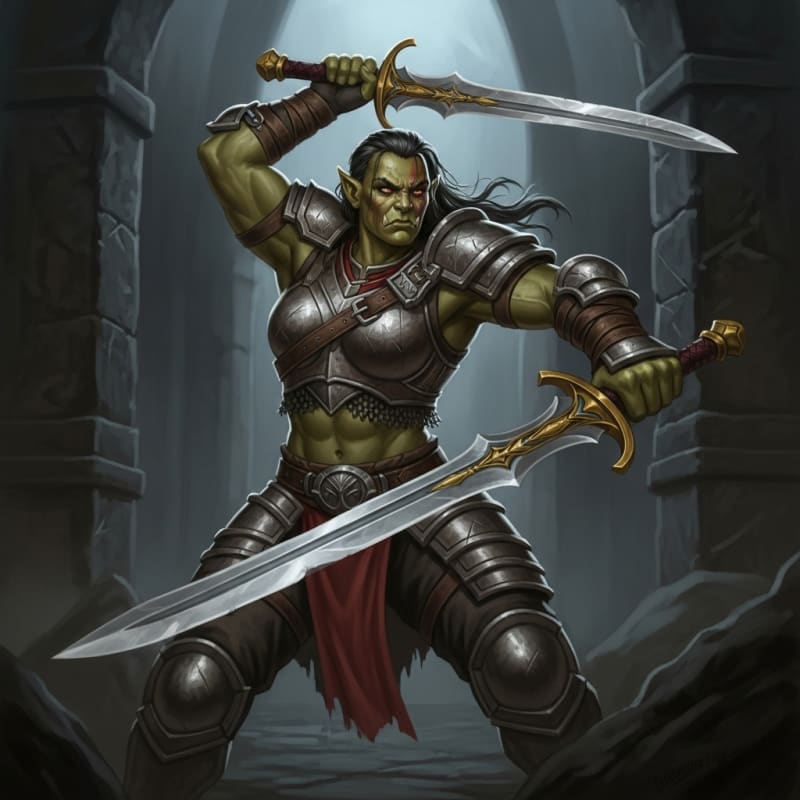
Isn't the two-sword style in Kendo cool? Source: https://easy-peasy.ai/ai-image-generator/images/elegant-double-swords-half-orc-warrior-dnd-5e-scene
Smaller, and Smaller! The Charm of Keyboards
Before we jump right into the Corne keyboard, let’s briefly go over a few types of keyboards.
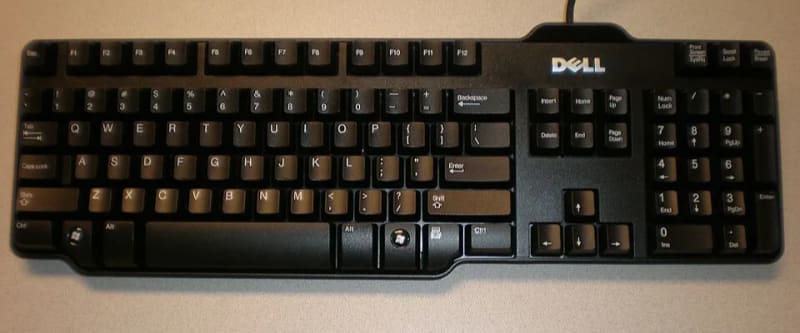
A typical keyboard. Source: http://bit.ly/47pY3X1
100% (Full-size):
This is the most common keyboard.
A keyboard with a number pad (numpad) on the right.
This is probably the keyboard layout we are most familiar with, right?
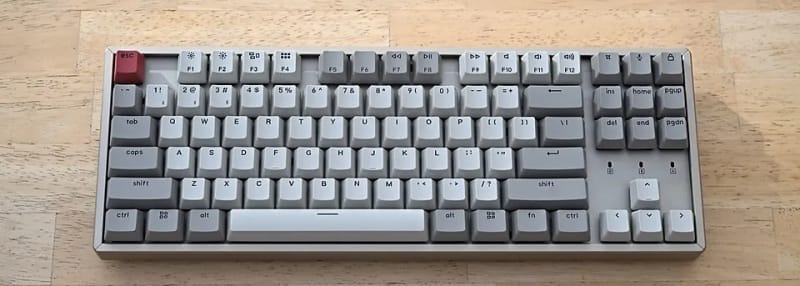
Tenkeyless keyboard. Source: http://bit.ly/41wpZF4
80% (Tenkeyless):
This is a full-size keyboard with the number pad removed.
In fact, people like me who have used laptops frequently since they were young are probably familiar with this form factor since they rarely use the number pad.

Happy Hacking Keyboard. Source: http://bit.ly/4gaGs7Y
60% ~:
From here, the F1-F12 function keys (function row) are also gone, making the keyboard even smaller.
The Happy Hacking Keyboard (HHKB), which a junior colleague in the computer science department strongly recommended to me during my undergraduate years, is a celebrity in this field.
He passionately argued that the combination of Vim and HHKB maximizes development efficiency.
However, I didn’t get into HHKB because I couldn’t get used to Vim in the first place. Besides, I wasn’t that heavy of a developer.
At this stage, the arrow keys on the keyboard disappear and you use HJKL to control the arrow keys (pressing a layer key and then HJKL inputs the arrow keys. It’s said to be a standard keymapping in the development world.)
However, even back then, the simplicity of the Happy Hacking Keyboard remained in a corner of my heart as a strange charm…
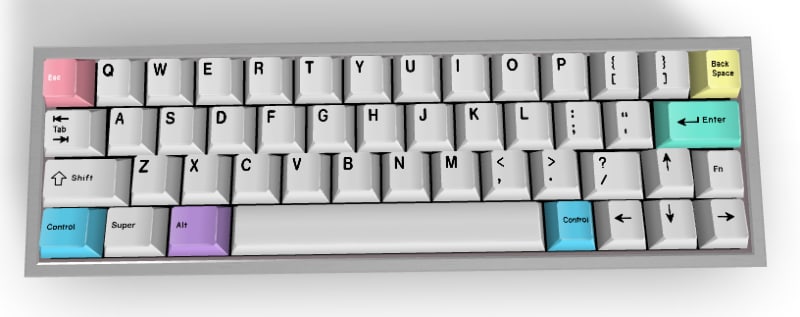
40% keyboard. I captured this from the keyboard simulator at https://keyboardsimulator.xyz/.
40%:
Where is the end of minimalism?
Finally, a layout that even gets rid of the number row appears. This is the 40% keyboard.
At this point, it’s almost a matter of taste, so there are various options for which keys to keep and which to get rid of. This means there are no standardized products.
It seems that some people describe it as being more like a remote control than a keyboard.
Anyway, to get back to the point, the Corne keyboard I have belongs to this category.
The Aesthetics of Ergonomics and Separation
There’s one more thing to point out here.
That is the Ergonomic keyboard.
You’ve probably all seen the curvy Microsoft or Logitech keyboards.
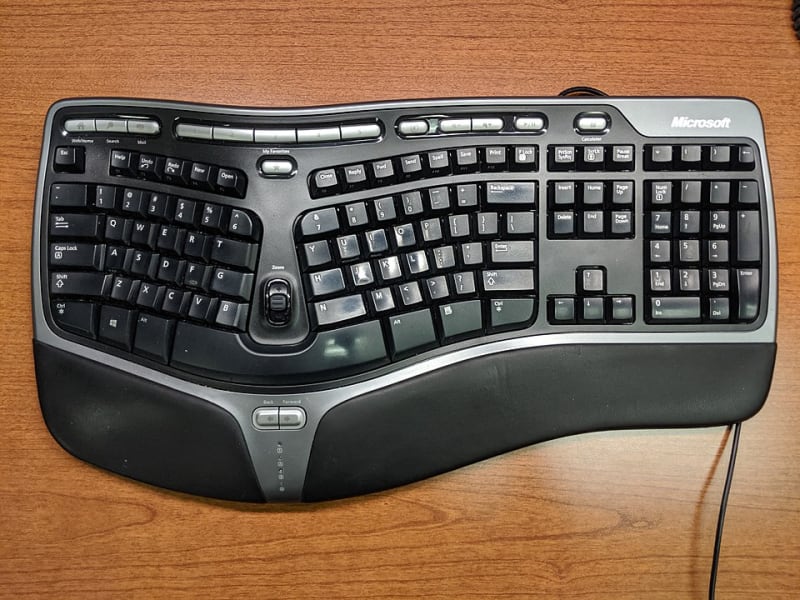
Microsoft's ergonomic keyboard. Source http://bit.ly/4g2KFdA
The biggest feature of these keyboards is the tenting in the middle, which is raised like a roof.
Just like when shaking hands, the wrist is most natural and comfortable when it is slightly raised rather than completely flat.
Tenting helps to induce this posture and reduce the burden on the wrist.
In this process, the ergonomic keyboard naturally divides the key layout into left and right…
The split keyboard is a keyboard that maximizes this concept of separation.
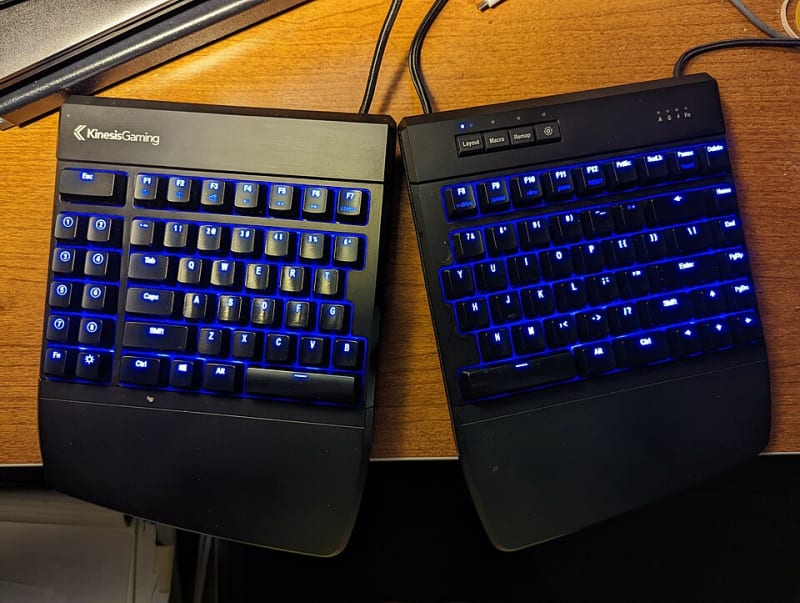
Split keyboard example: http://bit.ly/46pMUn9
The biggest advantage of a split keyboard. It’s that you no longer have to hunch your shoulders to fit the keyboard.
Of course, there are some difficulties that come from splitting one thing into two…
Anyway, it is clear that it is more ergonomic than a conventional keyboard in that you can spread your shoulders wide, which you would otherwise have to narrow.
Among the many choices, why I chose the Corne
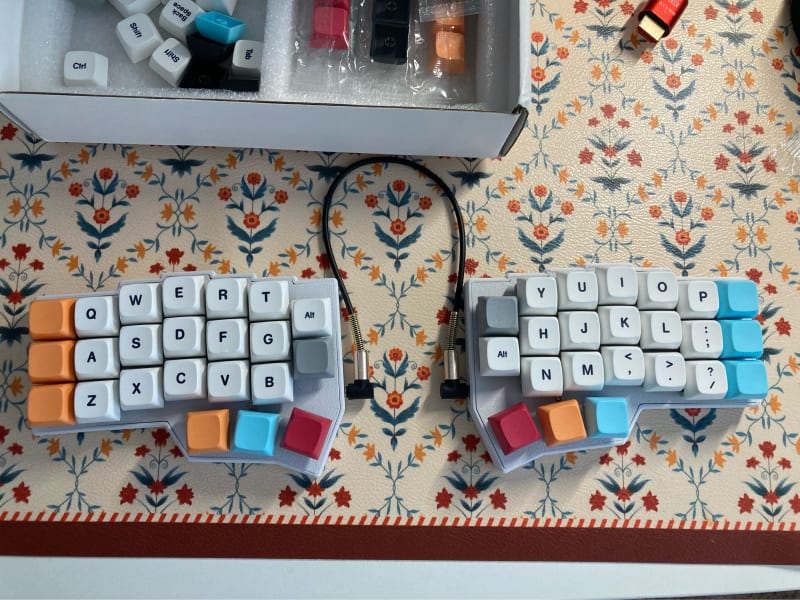
The model I chose is the Corne v4.1 (3x6 layout) purchased from AliExpress.
My Corne keyboard. I also changed the keycaps for the first time in my life.
It is a layout that is often recommended for beginners to split keyboards. There are three main reasons why I chose the Corne.
1. Beginner-friendly 3x6 layout
A 40% keyboard requires you to input numbers, special characters, and F-keys all through layers.
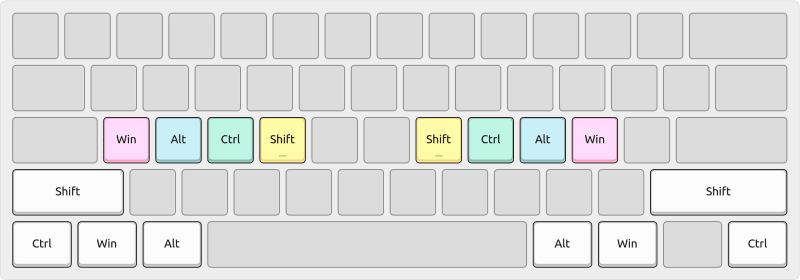
For example, the blue keys that I press with my thumb on my keyboard layout are layer switching keys.
It’s easy to understand if you think of the Fn keys commonly used on laptops.
When you press Fn and a key, doesn’t it input a different key than the one that is there? In the same way, the point of layers is to cram various keys into a small space using layer keys.
Of course, this is something that takes some getting used to.
The Corne’s 3x6 layout provides a minimum of convenience in this extreme minimalism.
If it were a 3x5 layout, there would have been no proper space to place essential special keys like Tab, Ctrl, and Shift.
Home Row Mod Source: https://sunaku.github.io/home-row-mods.html
Of course, people who are used to minimalism set it up so that if you press and hold a normal key, it becomes a special key, which is called home row mod.
People who use 3x5 seem to use this function mainly. But it’s a bit early for me, so I’ll pass.
Anyway, the 3x6 layout has an extra row on the outermost side, which gave me time to arrange the special keys and get used to the split keyboard.
2. Additional keys in the middle: No need to change my typing habits
My Corne photo again
The Corne 4.1 I use can be more accurately described as a 3x6+4 layout. Do you see the two extra keys on the inside of each keyboard, for a total of four? Thanks to these keys, the setup was much more convenient for me.
There is a problem that Korean split keyboard users often experience, which is the ㅠ and b key problem.
ㅠ: In the Korean Dubeolsik layout, the vowelㅠis designed to be typed with the right hand.b: In the English QWERTY layout,bis designed to be typed with the left hand.
Is it because of this? Many users habitually type ㅠ with their left hand and b with their right hand.
This is not a problem when using a single keyboard, but this disadvantage is highlighted when the keyboard is split.
In my case, I also had a habit of typing the y key with my left hand, so this part was also inconvenient.
Fortunately, the Corne I purchased has those extra keys in the middle, so I was able to assign keys like y and ㅠ to both the left and right hands.
In other words, I was able to easily adapt to the split keyboard without having to change my typing habits.
3. Mild Column Stagger
Most split keyboards adopt the Column Stagger method.
Unlike conventional keyboards, which arrange the starting points of each row differently, column stagger finely adjusts the height of each column to match the length of the fingers.
It is an ergonomic design that considers the natural position of the index, middle, ring, and pinky fingers. However, this is also a different arrangement from a conventional keyboard, so it takes some getting used to.
Fortunately, the degree of curvature of the column stagger on the Corne is relatively gentle compared to other split keyboards (e.g., Totem).
Thanks to this, it was easy to get used to it without much resistance. The problem is that once I got used to it, I started to wish there was more stagger, but human greed is endless.
Usability of the thumb: Thumb Cluster
The most satisfying part of getting used to a split keyboard is that the usability of the thumb has been maximized.
When you think about it, the strongest and most free finger on our hand is the thumb. However, on a conventional keyboard, the thumb’s role was only to press the space bar. Split keyboards maximize the potential of the thumb through dedicated thumb keys called Thumb Clusters.
I reorganized my thumb area like this:
- Left thumb: Alt, layer switching key, space
- Right thumb: Backspace, enter, layer switching key
I especially liked being able to press backspace with my thumb. In retrospect, backspace is one of the most frequently used keys while typing. In that sense, I think it makes more sense to press it with the strongest finger, the thumb, rather than the pinky finger.
The fatigue on my wrist has also been significantly reduced. This is because all the keys are close together, so I don’t have to reach or move my hands much.
4 weeks of inconvenience. The liberation that followed
To be honest, my typing speed was not very fast at first. There were moments when I felt awkward and wondered if I had bought it in vain.
However, as I continued to use it and modified the layout to my liking, it has become as comfortable as if it were a part of my body. I really liked the freedom to arrange and assign the functions I wanted in the way I wanted.
Above all, it was much more comfortable to work with the keyboard spread wide to match my shoulder width. As my shoulders straightened, I felt like my stooped back and neck were also straightening out.
It was also fun to create my own custom keyboard and keymap.
Is there anyone suffering from postural imbalance and pain due to long hours of computer work? Perhaps a split keyboard could be your solution.
If you can overcome the initial adjustment period well 😅
The Keyboard ‘Rabbit Hole’
As I browse websites, there is something that everyone says.
The world of keyboards is like a rabbit hole. Once you fall deep into it, you fall endlessly.
I thought I had achieved something by purchasing a Corne and getting used to a 40% split keyboard, but the more I looked, the deeper the abyss of the keyboard world was.
First of all, there were masters who pursued extreme minimalism, such as the 3x5 layout mentioned earlier.
I also witnessed a dimension of efficiency that I could not even imagine, such as assigning all special keys such as Ctrl, Shift, and Alt to the basic positions such as asdf and jkl; through the aforementioned ‘Home Row Mods’ to minimize finger movement.
I also applied this concept a little, and I am using the Ctrl key very usefully through Home Row Mods.
However, I also use the Shift key frequently, so I didn’t like the short delay when the home row key was activated, so I ended up assigning shift to the 6th column of the left keyboard.
It’s definitely a good method, but Home Row Mods seems to be a technology that is still too early for me.
In the deeper abyss of the keyboard rabbit hole, there was also this kind of thing.
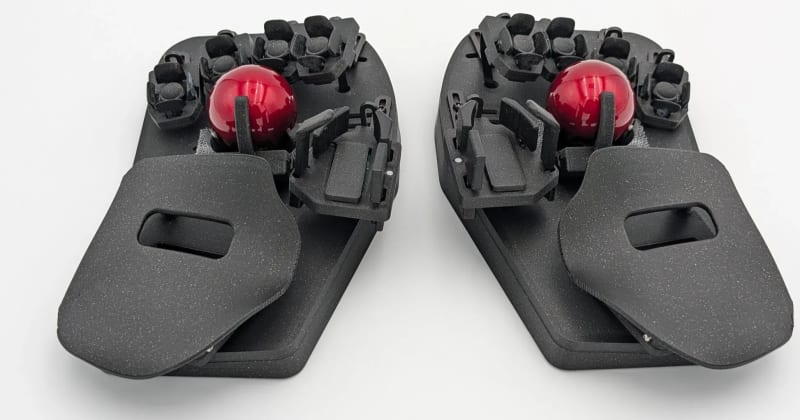
The ultimate split keyboard(?), the Svalboard Source: Svalboard website: https://svalboard.com/products/lightly
It’s called a SVALBOARD. Doesn’t it look intimidating just by looking at it?
First of all, people who have come this far use a trackball instead of a mouse as a basic. As you can see, this thing doesn’t press keys, but moves your fingers up, down, left, and right, and that movement is how you type.
To be honest, I really want to try it once, but I don’t have the courage to buy it.
Still, I think using that would make me feel like a pilot sitting in the cockpit of a Gundam.
I also considered a trackball or trackpad, but I decided to be satisfied with a vertical mouse.
I did assign a mouse key for when I’m too lazy to let my hand leave the keyboard, but I’m still more comfortable with a physical mouse.
At the end of this whole journey… there were also masters who reached the stage of designing their own circuits, soldering with a soldering iron in hand to create their own custom keyboard, and printing a one-of-a-kind case with a 3D printer.
To be honest, the creation process looks really fun, but I haven’t held a soldering iron since I graduated from undergraduate school, and I don’t have any plans to get a 3D printer at home yet, so I’m not confident.
Anyway, the world of keyboards seems to be a very deep and enjoyable hobby area that is hard to get out of once you fall into it.
In fact, the content covered in this post is only a small part, and when you get into switches and keycaps, there is another world. What about the key pressure, which switch is good, which keycap is low and which is high, so which is better…
For now, I’m satisfied with putting a few custom keycaps on the default keycaps.
Anyway, I am very satisfied with my current Corne keyboard, and I plan to stay in this comfort for a while.
But who knows. Maybe one day I’ll be searching for a Totem keyboard or a 3x5 layout without even realizing it….
Other posts in the same category
View All →
Fellowship app begins (1)
Again, time to write my personal statement 😅

My CGM Journey: Real-time health witnessing
A 2-Week Review of the Stelo CGM

Travel Guide to New York State Suburbs
The landscapes are so beautiful before the leaves start falling in earnest.